Vegan Traybakes: A Practical One-Tin Guide
- What makes a good vegan traybake?
- Which traybake style should you choose?
- How does tin size change a traybake?
- What equipment keeps the process predictable?
- How should a vegan traybake batter be mixed?
- What is a reliable one-tin workflow?
- How can you tell when a traybake is done?
- Which topping is easiest for a crowd cake?
- How do you cut equal traybake portions?
- Why did the traybake turn out dense, dry or sunken?
- How should vegan traybakes be stored and shared safely?
- What should you decide before you start?
What makes a good vegan traybake?
A good vegan traybake matches a tested batter to the tin, gets into a fully heated oven promptly, and uses a topping that suits how the cake will be stored and served. For the easiest route, choose a 20cm square recipe written for that tin, line it well, weigh the ingredients, and test the centre at the recipe's earliest stated time. Vegan describes the ingredients, not the absence of allergens, so labels still matter.
Traybakes work for parties because one tin does the job. That simplicity does not make cake batters interchangeable. Tin area controls batter depth and baking time; the topping changes storage and serving.
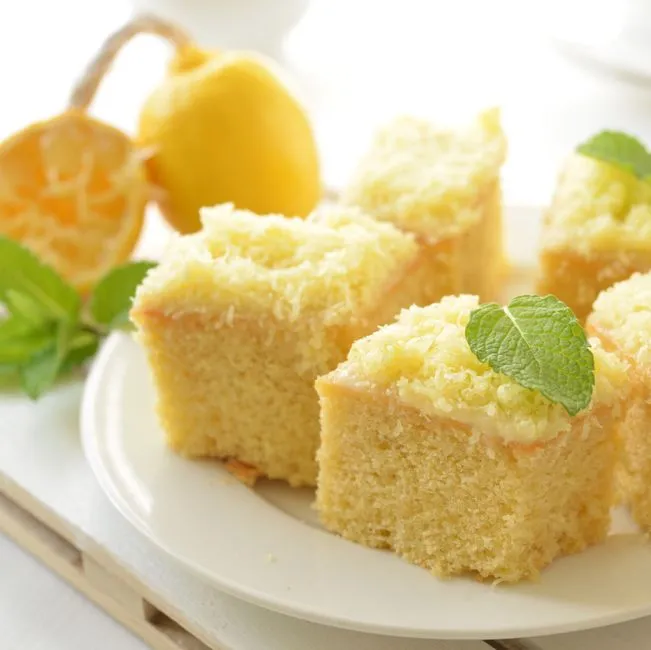
This guide is the planning layer: how to choose the tin, style and finish before flour meets liquid. When you want the complete quantities and timing for a specific cake, use a tested recipe such as our vegan lemon drizzle traybake.
Which traybake style should you choose?
Start with the finished slice rather than a list of fashionable ingredients. Four questions narrow the choice quickly:
- How will it travel? A set drizzle or thin glaze tolerates a lidded box better than a tall, soft frosting.
- When will it be eaten? A cake baked the previous day needs a finish that holds well overnight. Fresh fruit is better added close to serving.
- How many neat portions are needed? A square cake divides cleanly into a grid. Decide the grid before decorating so every slice receives part of the finish.
- What must the ingredient labels accommodate? Vegan food can still contain or encounter allergens. Check every packaged ingredient and any decorations for the people who will eat the cake.
For a bright, firm-edged cake that travels neatly, lemon drizzle is a dependable direction. For a darker, softer crumb, use the mixing logic in our one-bowl vegan chocolate cake, but keep that recipe in its specified deep 20cm round tin. It is a useful flavour reference, not permission to pour the batter into an arbitrary roasting tin.
The wider cakes and traybakes collection is the safest place to find a recipe already tested in the format you want.
How does tin size change a traybake?
Compare the area of the tin at its base. A 20cm square tin has an area of 400cm2. A 23cm square tin has an area of 529cm2, which is about 32% larger. Put an unchanged 20cm-square batch into the larger tin and its theoretical depth falls to about 76% of the intended depth. The result will usually bake faster and expose more edge relative to its centre.
A common 23 x 33cm rectangular tin covers 759cm2. Matching the depth of a recipe written for a 20cm square would require 759 / 400 = 1.8975 times the batter. That awkward factor is the point: changing tins is not a harmless swap. Doubling the batch would make it about 5% deeper than the exact area calculation, and the baking time would still require testing rather than guesswork.
If a recipe must be scaled, multiply every ingredient by the same area factor, including flour, sugar, liquid, fat and raising agents. Do not round tiny raising-agent quantities casually. For a celebration where timing matters, use a recipe written for the tin instead of making the first scaled attempt on the day.
Depth matters too. A shallow baking sheet will not contain a cake intended for a tin at least 4cm deep. Measure the inside base of the tin, not the flared rim, and check that the stated depth leaves room for the batter to rise.
What equipment keeps the process predictable?
The useful kit is modest:
- a tin of the specified internal size and depth;
- baking parchment;
- digital scales;
- separate bowls or a large bowl and jug, depending on the recipe;
- a whisk for distributing dry ingredients;
- a flexible spatula for folding and scraping the bowl;
- a timer; and
- a cooling rack.
Scales matter because flour settles differently in cups and jugs are not designed to measure dry ingredients accurately. Parchment provides handles as well as release. Leave enough overhang on two sides to lift the cooled cake without digging at its edges.
Preheat the oven fully before mixing a batter raised with bicarbonate of soda and acid. Position the shelf as the recipe directs, prepare the tin and weigh every ingredient first. Oven shelves and tins become burn hazards as soon as baking starts: use dry oven gloves, keep handles and cooling racks clear, and keep children away from the open oven door.
How should a vegan traybake batter be mixed?
Follow the order in the chosen recipe. In a typical one-bowl or two-bowl vegan cake, the aim is to disperse the raising agents evenly, combine the liquids uniformly, and stop mixing once no dry pockets remain.
First whisk the dry ingredients thoroughly. A small clump of bicarbonate of soda can leave a bitter spot, while poorly distributed raising agent can produce an uneven rise. In another vessel, mix the plant milk, oil and acid if the recipe calls for them. Add wet to dry and fold only until the batter is uniform, scraping the base and sides of the bowl.
Once acid meets bicarbonate of soda, the leavening reaction has begun. Transfer the batter to the prepared tin, level it gently and put it into the heated oven without leaving it on the counter.
Do not automatically add flax, aquafaba, banana or another egg replacement to a recipe that was developed without eggs. The flour, liquid and raising system may already be balanced. If you are converting a conventional recipe, first identify what the egg did: binding, moisture, lift or structure. Our vegan egg substitutes guide explains those different jobs and why one replacement does not suit every cake.
What is a reliable one-tin workflow?
Use this order to prevent the common last-minute scramble:
- Read the recipe once from start to finish, including cooling and topping time.
- Confirm the tin size and check the oven setting for fan or conventional heat.
- Check ingredient and decoration labels, then prepare the tin.
- Heat the oven fully and arrange a safe landing place for the hot tin.
- Weigh dry ingredients and liquids separately.
- Mix in the stated order and stop as soon as the batter is uniform.
- Scrape all the batter into the tin, spread it evenly and bake promptly.
- Start checking at the earliest time in the recipe.
- Cool for the stated time before lifting or turning out.
- Apply the chosen topping only when the cake is at the correct temperature.
That final condition changes with the finish. A drizzle is commonly spooned over a warm cake so it can enter the crumb. A sugar glaze needs a cool surface or it can melt and disappear. Buttercream also needs a completely cool cake; residual heat softens the fat and makes the finish slide.
How can you tell when a traybake is done?
Use several signs together. The centre should look set rather than fluid, the surface should spring back lightly, and a skewer inserted into the middle should emerge without liquid batter. A few moist crumbs may be appropriate for some cakes; wet streaks are not. Colour alone is unreliable, especially with cocoa, dark sugar or a pale lemon batter.
Check the centre first because it is generally the last part to set. If your oven has known hot spots, a second test between the centre and a corner can reveal whether one side is advancing faster. Open the oven only when the cake is near the recipe's stated lower time. An early door opening releases heat before the structure has set.
The published lemon traybake is tested at 180C conventional, 160C fan or gas 4 in a 20cm square tin, with checks beginning at 30 minutes and a stated range of 30 to 36 minutes. Those numbers belong to that recipe and tin. They are not a universal timetable for every traybake.
Which topping is easiest for a crowd cake?
Choose the finish according to temperature, transport and storage.
| Finish | Apply when | Best quality | Main planning point |
|---|---|---|---|
| Citrus drizzle | Cake is warm, as the recipe directs | Sharp, moist crumb with a light crust | Prick evenly and distribute the liquid across the whole surface |
| Simple sugar glaze | Cake is completely cool | Thin, sliceable finish | Add liquid gradually so the glaze does not become too loose |
| Buttercream | Cake is completely cool | Rich, decorative finish | Allow space above it in the transport box |
| Melted chocolate finish | Cake is cool | Firmer top once set | Cut with a clean knife before the top becomes excessively hard |
| Fresh fruit | Close to serving | Fresh colour and contrast | It adds moisture and often shortens the practical storage window |
Sprinkles, chocolate and biscuits need the same label check as the batter. A decoration can be the ingredient that changes the allergen picture, even when the cake beneath it is vegan.
How do you cut equal traybake portions?
Cool the cake fully before cutting. Lift it out by the parchment and place it on a stable board. Mark the edges first, then make the long cuts before rotating the board for the cross-cuts.
A 20cm square gives 16 equal pieces with a four-by-four grid, each nominally 5cm square before allowing for edge variation. A three-by-four grid gives 12 larger rectangles. For a 23 x 33cm cake made from a recipe specifically tested for that tin, a four-by-six grid gives 24 portions measuring roughly 5.75 x 5.5cm before trimming.
Use a long, sharp knife and wipe it between cuts when the topping is sticky. Cut downward rather than sawing through a delicate crumb. If exact presentation matters, make one paper grid or measure the edge marks with a ruler before the first cut.
Why did the traybake turn out dense, dry or sunken?
| Problem | Likely checks | Better next step |
|---|---|---|
| Dense or gummy centre | Wrong tin, too much liquid, underbaking, or delayed baking after mixing | Verify the tin, weigh accurately, preheat fully and bake promptly |
| Dry edges with a wet middle | Tin too small or oven running hot | Use the specified tin and check oven accuracy with an oven thermometer |
| Cake rises then sinks | Centre not set, door opened early, or raising agents mismeasured | Check measures, avoid early opening and test the centre before removal |
| Uneven rise | Batter not level, raising agent poorly dispersed, or an oven hot spot | Whisk dry ingredients well, level gently and learn the oven's heat pattern |
| Cake sticks | Incomplete lining, removal too early, or syrup glued to an exposed edge | Line as directed and observe the stated cooling time |
| Glaze vanishes | Cake was still warm or glaze was too thin | Cool fully and add glaze liquid a little at a time |
Change one variable on the next bake rather than several. A note of the tin, oven mode, actual time and result is more useful than trying to diagnose from memory.
How should vegan traybakes be stored and shared safely?
Cool the cake before enclosing it; trapped steam softens the surface and can make a topping run. Then follow the recipe and ingredient labels. A plain cake, a buttercream cake and a cake topped with fresh fruit do not share one universal storage rule. The component with the strictest storage requirement governs the finished bake.
Flour is generally a raw product and is not normally treated to kill food-poisoning bacteria. The Food Standards Agency's flour guidance says not to eat or taste uncooked flour, dough or batter unless the product is labelled ready to eat. Wash hands and clean bowls, utensils and work surfaces after contact with raw flour or batter.
Vegan is not the same as allergen-free. UK food labelling guidance explains that prepacked food must emphasise any of the 14 regulated allergens in its ingredients list, and that vegan labelling does not guarantee a product is free from allergen cross-contact. Check every label each time you bake, keep packaging available for guests, and avoid making a free-from claim unless every ingredient and the preparation environment support it.
What should you decide before you start?
The compact version is simple: choose a published recipe for the exact tin; decide the portion grid and topping before shopping; check every label; prepare the tin and fully heat the oven; weigh rather than estimate; mix in the stated order; bake promptly; and use the recipe's own doneness window. Cool at the correct stage, finish for the way the cake will travel, and record what happened. That is how one tin stays the easy option.