One-Bowl Vegan Chocolate Cake: Deep, Soft, Simple
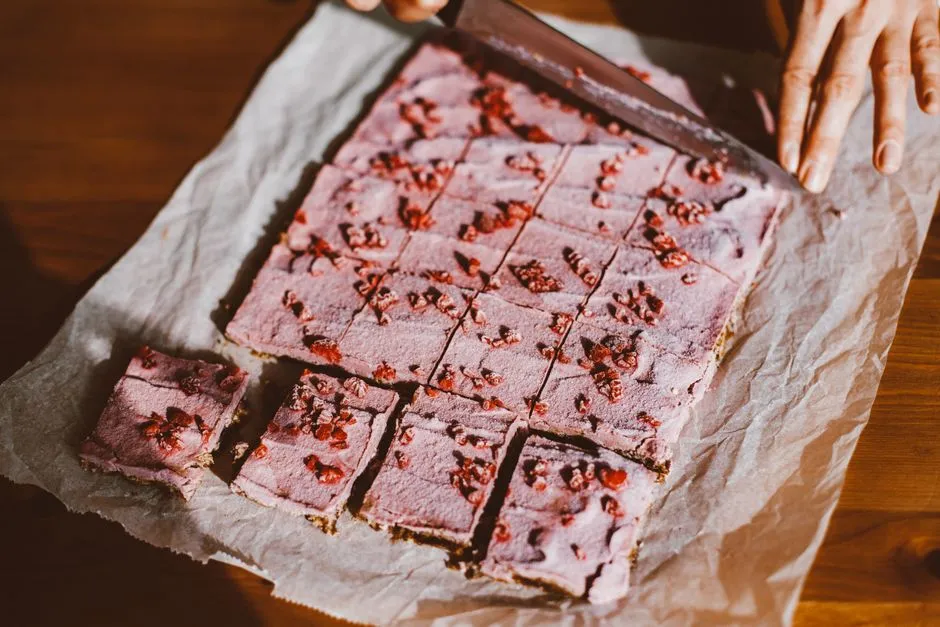
- One bowl, one tin, no mystery arithmetic
- Recipe at a glance
- Ingredients
- What does “one bowl” mean here?
- Prepare the oven and tin first
- Why the 20cm round tin matters
- Whisk the dry ingredients thoroughly
- Add the wet ingredients in one go
- Bake for 35 to 42 minutes
- Cool in two stages
- Make the coffee or water choice deliberately
- Plant-milk substitutions
- Two-layer variation
- A simple cocoa glaze
- Troubleshoot by cause
- Store and freeze
- Sources
One bowl, one tin, no mystery arithmetic
This vegan chocolate cake is dark, soft, and deliberately ordinary to make. Cocoa supplies depth, hot coffee or water wakes it up, and cider vinegar meets bicarbonate of soda only after the oven and tin are ready. That last detail matters: once the batter begins producing bubbles, it would prefer to bake rather than wait while you locate parchment in the cupboard's archaeological layer.
The recipe makes one deep 20cm round cake. It contains no intentionally added egg or dairy, but “vegan” does not automatically mean safe for a food allergy. The Food Standards Agency distinguishes vegan claims from free-from claims: a vegan label is not an allergen-safety guarantee. Check every ingredient and precautionary allergen statement, and manage cross-contact for the actual people eating.
Recipe at a glance
- Tin: One deep 20cm round cake tin, at least 5cm deep
- Yield: 10 to 12 slices
- Preparation: 15 minutes
- Baking: 35 to 42 minutes
- Cooling: 15 minutes in the tin plus 45 minutes on a rack
- Total: 1 hour 50 minutes to 1 hour 57 minutes
- Oven: 180°C conventional / 160°C fan / gas mark 4
The totals recompute exactly. At the low end: 15 + 35 + 15 + 45 = 110 minutes, or 1 hour 50. At the high end: 15 + 42 + 15 + 45 = 117 minutes, or 1 hour 57.
Ingredients
- 250g plain flour
- 200g caster sugar
- 40g unsweetened cocoa powder
- 6g bicarbonate of soda
- 3g fine salt
- 250ml unsweetened soya milk, at room temperature
- 80ml neutral oil, such as rapeseed or sunflower
- 15ml cider vinegar
- 5ml vanilla extract
- 150ml hot freshly brewed coffee or hot water
Use plain cocoa, not drinking chocolate, which includes sugar and other ingredients. Check that sugar and flavourings meet your vegan requirements. If baking for someone with an allergy, inspect all labels—including cocoa, plant milk, and vanilla—and do not infer “free from” from a vegan description.
What does “one bowl” mean here?
One bowl means one mixing bowl, not one object in the entire kitchen. You still need a scale, a liquid measure, measuring spoons, a whisk, a flexible spatula, the prepared tin, and a cooling rack. That distinction matters because the recipe depends on measured quantities rather than a succession of approximate mugfuls.
Put the empty mixing bowl on the scale and use the tare function between the larger dry ingredients. Measure the 6g bicarbonate and 3g salt carefully rather than tipping them freehand. Measure all five liquids before they enter the dry bowl, because the mixing stage is deliberately short. Once vinegar meets bicarbonate, whisk, scrape, transfer, and bake without a pause.
This workflow keeps washing-up modest while protecting the two controls that matter most: an even distribution of the small amount of raising agent, and prompt movement of the mixed batter into a fully preheated oven.
Prepare the oven and tin first
Heat the oven to 180°C conventional or 160°C fan. Grease the tin lightly and line its base with baking parchment. Add a parchment collar only if the tin is shallower than 5cm; a properly deep 20cm tin is preferable.
Set the tin on a flat tray if its base is loose, but do not place a springform tin with an uncertain seal directly over the oven floor. Position a rack in the middle of the oven and allow full preheating time.
Weigh everything before mixing. Vinegar and bicarbonate start reacting promptly, so this is not the batter to abandon while discovering the coffee machine would like descaling.
Why the 20cm round tin matters
Measure across the inside of the tin at its top edge. A 20cm round tin has a radius of 10cm, so its surface area is about 314 square centimetres: π × 10 × 10. A 20cm square tin has 400 square centimetres of surface area. That is about 27% more area for the same batter, which makes a shallower cake that is likely to bake sooner.
For that reason, the 35-to-42-minute range belongs to the deep 20cm round tin specified here. A 20cm square tin is not a direct timing substitute. If the only available tins are shallow, use the specified two-layer variation below rather than overfilling one tin. Do not fill any tin beyond the capacity stated by its manufacturer.
Whisk the dry ingredients thoroughly
Set a large mixing bowl on the scale. Add 250g flour, 200g sugar, 40g cocoa, 6g bicarbonate, and 3g salt. Whisk for 30 to 45 seconds, breaking up cocoa lumps and distributing the tiny amount of raising agent through the much larger flour mass.
If the cocoa is badly lumpy, sift it with the flour. Do not sift by shaking flour from a height; flour is a raw powder that spreads easily. The Food Standards Agency says uncooked flour can contain food-poisoning bacteria, so do not taste the dry mix or finished batter.
Keep flour away from ready-to-eat food. Wash hands, utensils, and surfaces after handling spills.
Add the wet ingredients in one go
Make a well in the dry mixture. Add 250ml soya milk, 80ml oil, 15ml cider vinegar, and 5ml vanilla. Pour in 150ml hot coffee or water.
Whisk slowly from the centre outward until no dry pockets remain, about 30 to 45 seconds. Scrape the sides and base with a flexible spatula, then whisk for another 10 seconds. The batter will be loose and glossy.
Do not beat for several minutes. Once flour is hydrated, prolonged mixing develops more gluten and can make the crumb tougher. A few tiny cocoa flecks are preferable to turning the bowl into a cement mixer with emotional goals.
Pour immediately into the prepared tin and scrape the bowl. Tap the tin once or twice gently on the counter to release only large trapped bubbles.
Bake for 35 to 42 minutes
Place the tin on the centre rack. Do not open the oven for the first 30 minutes; the cake needs stable heat while its structure sets.
At 35 minutes, check the centre. The top should spring back lightly, the edges may just begin pulling from the tin, and a thin skewer inserted into the centre should emerge with a few moist crumbs but no streak of wet batter.
If wet, bake for 3 minutes and check again. Continue in 2- to 3-minute intervals, up to about 42 minutes. Oven accuracy, tin material, and ingredient temperature affect timing.
Do not taste batter from the skewer. Thorough baking is the safety step for raw flour; an egg-free batter is not automatically a ready-to-eat batter.
Cool in two stages
Set the tin on a heatproof rack for 15 minutes. Run a thin blunt knife around the edge where needed, place a rack over the tin, and invert carefully. Remove the base and parchment, then turn the cake upright onto a second rack.
Cool for at least 45 minutes more. The full 60-minute cooling period allows steam to leave and the crumb to settle. Cutting early compresses the centre and produces sticky slices that may look underbaked even when the cake was done.
If the cake resists release, wait another 5 minutes and check the edge rather than shaking or striking the warm tin.
Make the coffee or water choice deliberately
Hot coffee intensifies the impression of cocoa without necessarily making the cake taste of coffee. Brew it at ordinary drinking strength and measure 150ml. Espresso would be more concentrated and is not a direct volume replacement unless diluted to the total.
For a caffeine-free or neutral version, use 150ml hot water. The liquid balance remains identical. Do not add dry instant coffee directly to the batter; dissolve it fully in the measured hot liquid.
Changing coffee to water does not alter baking time in a meaningful planned way, but the actual cake still receives the same doneness checks.
Plant-milk substitutions
Unsweetened soya milk gives useful protein and a dependable body. Unsweetened oat milk can replace it millilitre for millilitre, though the crumb may be slightly softer or sweeter depending on the brand.
Avoid sweetened or strongly flavoured milk unless you deliberately accept the changed sugar and flavour. Tinned coconut milk is much richer and more concentrated, so it is not a direct 250ml swap. Thin almond milk may work, but it introduces a nut allergen and can produce a lighter body.
Always recheck labels. A plant milk can be vegan and still unsuitable for someone avoiding soya, nuts, gluten, or cross-contact.
Two-layer variation
For a sandwich cake, divide the batter between two greased and base-lined 20cm shallow tins. Weigh the empty tins, then weigh each after filling so the batter is divided evenly.
Bake at the same temperature for about 20 to 26 minutes, swapping shelf positions only if the oven requires it and only after the structure has set. Begin checking at 20 minutes. Cool 10 minutes in the tins and at least 35 minutes on racks.
The layer total is therefore different from the deep cake: 15 minutes preparation + 20 to 26 baking + 10 in tins + 35 on racks = 80 to 86 minutes. Do not reuse the deep-tin 35-to-42-minute bake range.
A simple cocoa glaze
Once the cake is completely cool, whisk 120g icing sugar with 20g cocoa and 25ml plant milk. Add up to 10ml more milk in 2ml increments until the glaze falls in a thick ribbon. The maximum liquid is 35ml.
Spread over the top and leave 20 to 30 minutes to set. This optional time is not included in the base recipe total. Check icing sugar, cocoa, and plant milk labels for vegan and allergen requirements.
For a filled layer cake, use a tested vegan buttercream or ganache and follow that topping's storage rule. The unfrosted cake's room-temperature guideline does not overrule a perishable filling.
Troubleshoot by cause
Cake sank in the centre: It may be underbaked, the oven door may have opened early, the bicarbonate may be excessive, or the mixed batter may have waited. Weigh 6g precisely and bake promptly.
Cake tastes soapy or metallic: Too much bicarbonate or poor distribution is likely. Do not use a heaped teaspoon approximation; weigh it and whisk the dry bowl thoroughly.
Dense strip at the base: Batter may have been overmixed, the oven too cool, or ingredients very cold. Bring plant milk to room temperature and verify the oven with an independent thermometer.
Dry edges: The tin may be too wide or dark, or the cake baked too long. Use the specified 20cm tin and begin checking at 35 minutes.
Flour pockets: Scrape the bottom and sides after the first whisk, but stop mixing as soon as the batter is uniform.
Our vegan egg-substitute guide explains why this recipe does not need a flax egg: acid, bicarbonate, gluten, and starch already provide its planned lift and structure.
Store and freeze
Once fully cool, keep the unfrosted or simple-glazed cake airtight in a cool room for up to 3 days as a quality guideline. If the room is hot or humid, refrigerate, accepting that chilling may firm the crumb. Follow any topping's stricter label or recipe instructions.
Freeze the plain cake or individual slices for up to 2 months for best quality. Wrap tightly, add a freezer-safe outer layer, label, and thaw covered at room temperature. Do not wrap while warm; trapped steam produces a tacky surface and ice crystals.
For a brighter counterpart, try the vegan lemon drizzle traybake. For a fruit-led loaf, the vegan banana bread uses weighed ripe banana rather than asking three bananas to agree on size.
This recipe provides general food-preparation information. Follow current food-safety guidance, ingredient labels, and appliance instructions. Vegan does not mean allergen-free. Never eat raw flour, dough, or batter unless specifically labelled ready to eat, and seek qualified advice for individual dietary or health needs.
Sources
- Food Standards Agency: Handling flour and flour products safely — raw flour is not normally treated to kill food-poisoning bacteria; do not taste uncooked batter unless it is labelled ready to eat, and clean hands, utensils, and surfaces after handling flour.
- Food Standards Agency: Allergen guidance for food businesses — vegan and free-from claims carry different meanings, and a vegan description does not by itself establish allergy safety.
- University of Illinois Extension: Baking soda vs. baking powder — bicarbonate of soda reacts with an acid such as vinegar to produce carbon dioxide; excess bicarbonate without enough acid can taste metallic.
- University of Illinois Extension: 4-H Cooking 201, pages 46–47 — quick-bread guidance on measuring bicarbonate carefully, avoiding overmixing, baking promptly in a preheated oven, and using crumb and edge cues for doneness.